It’s time to make some beer. I’ll run through the process I generally use to brew up a batch.
Let’s start with the recipe: it’s very basic but a lot of people seemed to enjoy this beer when I have made it in the past. The closest category of beer that it falls under is a British Bitter but with a little higher alcohol percentage and a little on the low side for bitterness.
Jolly Bob
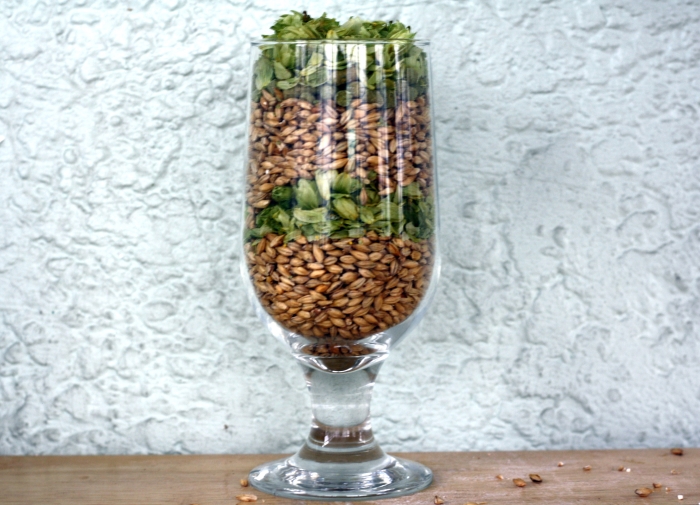
5 Kg Maris Otter
.250 Kg Caramunich
53 Grams Fuggles @60 min 27 IBU
15 Grams Fuggles @10 min 3 IBU
15 Grams Fuggles @0 min 0 IBU
1 tsp Irish Moss
40 litres Water (I use tap water left out over night)
Wyeast 1318 London III with a 2 litre starter or Nottingham dry yeast.
Targeted OG: 1.050
Targeted FG: 1.012

Step 1. Crush your grains. You can buy a mill or crush them at your Local Homebrew Store (LHBS). For the crush, you would only need to crack the hull to remove the starches inside. If you crush it too fine, you may end up with a stuck sparge (the wort won’t drain) and that becomes a horrible, hot mess. Rice hulls are handy to have around especially for fine grains or if you are using a lot of wheat. In my multitude of batches, I only had one stuck sparge and that was because I used twice as much grain for a high gravity beer. If it is not crushed enough, you may end up with poor efficiency causing your intended 5% ABV beer to end up being 3% ABV which to some is considered a travesty.

Heat your strike water to 163 Farenheit or 73 Celsius and then pour it in your mash tun. I normally heat up 20 litres of water for the mash and use 20 litres for the sparge, which generally nets me 30 litres of pre-boil wort. A thinner mash (more water in tun) will result in a fuller bodied beer whereas a thicker mash (less water in tun) will make a thinner bodied beer. If you are making a light lager, I would recommend using a thicker mash. The general rule of thumb is 1.5 quarts of water per pound of grain.
For my system, when I add the crushed grains, the temperature will drop about 10 F or 6 C but everyone’s system is slightly different so find out what works for you. Mash temperature is very important, that will determine whether you will have a dry beer (149 F) or a sweet beer (155 F). I usually add the water slightly hotter and wait for it to cool down in the mash tun before adding the grains. That way, your tun has a chance to heat up a little.

Add your grains then stir to remove any clumps. The British Maris Otter malt has a tendency to clump way more than regular 2-row domestic malt (which can be easily substituted if you don’t have MO), so you would have to be more diligent in making sure there are no clumps. After you have stirred to remove clumps, check your temperature. If it is too hot, add some ice cubes and if it is too cold, remove a litre or so of wort and heat that up and add that back in the tun. It is easier to cool down than to heat up. After it has reached the desired temperature, cover the tun with a blanket to prevent any heat from escaping.
Now, it is time to wait. Have a beer, clean your fermentor, heat up your remaining water for the sparge, and prep for your boil.

After approximately an hour, you can get ready to drain the wort. There are a few different techniques people use such as mash out, batch sparge or fly sparge. I mostly just batch sparge and that is just adding 15 litres of the 175 F or 80 C water to the mash tun, stir it up and wait ten minutes. At that point, I will vorlauf, which is collecting the first couple litres of wort into a separate container. When you start draining, there will always some particles trying to get into the boil kettle. Just vorlauf until the wort runs clear and add that amount back into the tun and now you may fill up your boil kettle. I try to do a double sparge to make sure all the sugars are extracted. My standard procedure is to fill up to 8 gallons or 30 litres of wort.

At this point, I will check my pre-boil gravity reading with my hydrometer. The gravity reading will be correct when it is at 68 F or 20 C. My wort temperature at the time of the photograph was 133 F or 56 C. Instead of doing math myself, I find myself an online calculator that does the work for me: http://www.brewersfriend.com/hydrometer-temp/. So, my pre-boil wort is 1.040. From my experience, I know that after the boil, my gravity reading goes up .010 points, making it 1.050, which is right on target.
Bring your wort to a boil. I like that my brew pot has a nice headspace for 21 litre batches so I don’t have to really worry about a boil over. They do happen though so you have to keep an eye on it. Spraying water on the foam reduces it as does removing the pot from the heat or turning it down. I normally like boiling my wort for at least 60 minutes and if I’m using pilsner malt, I will boil for 90 minutes. This is done to prevent Dimethyl Sulfide (DMS) from making your beer smell like cooked corn. Some lighter lagers require it so that’s another reason to avoid it. That’s also a main reason why you don’t boil with the lid on.

Add the bittering hops. After a 60 minute boil, all the flavour of the hops has been boiled off and just the bitterness remains. Flavour hops are added at about 15 minutes to retain the taste of that particular hops and aroma hops are added at the end of the boil or during dry hop. I usually add my aroma hops during the chilling process to get the best aromatics out of them. The hops that I am using in this recipe are a British variety, which lends a grassy aroma and a woody, earthy flavour to the beer.

Collect about half a cup of wort and use that to rehydrate your Irish moss which is used to clarify your beer. You can use Whirlfloc as well, which is just a pill form of Irish moss. I add a generous teaspoon of it to the wort and let it cool. I throw the rehydrated moss at about 10 minutes left in the boil.
After you have added the moss and the hops and the 60 minutes are up, you shut off the heat and prepare to chill the beer as quickly as possible. Some people use an immersion chiller, which is coiled copper tubing that is placed inside the brew kettle and cold water runs through the device, cooling down your wort. The quicker you cool it down, the less chance of bacterial contamination and better chance of a clearer beer. Other methods are a chiller plate or just sticking your brew kettle in an ice bath for an hour or so.
After the wort is chilled down to pitchable temperatures (proper climate for optimal yeast activity), get it in the clean and sterilized fermentor. If you are using a glass carboy, it’s best to use an auto siphon. I use a plastic bucket to ferment a lot of my brews and I have a tendency to just pour it from the kettle to the fermentor but I make sure I don’t get a lot of the gunk from the bottom into the bucket.

Aerate your wort. This is the only time in the beer making process that adding oxygen is beneficial to the brew. I use a disposable oxygen tank from Home Depot and attach a regulator, tubing and a .05 diffusing stone. Of course, anything you add into the wort at this point must be sterilized. Try not to put your fingers on the diffusing stone because the oils on your fingers will clog up the stone. I generally boil the stone and tubing to sterilize.
[related_content slugs=”tis-the-saison,how-to-start-home-brewing,pumpkin-beer-is-here,manitobas-first-proam-brew-challenge” description=”More Borowski on Beer” position=”right”]
Pitch the yeast. I used a liquid yeast with a 2 litre starter but if you are new to brewing game, I would strongly suggest that you use a dry yeast such as Nottingham that is nice for bitters. Rehydrate the yeast to manufacturer specifications to prevent yeast shock that could result in off flavours. Keep the fermentor in an environment with a consistent temperature. Nottingham does well between 60 F and 70 F (16 C and 21 C). Usually, the warmer the temperature, the more estery (fruity) the beer. Let it ferment for 2 weeks, then bottle or keg.
Next week I’ll talk about malt profiles.
–
Mark Borowski is a home brewer, and a father, and is looking for a job as a bartender. Follow him on Twitter @oldblackbrew